Self-segregating Trash Bin Using Arduino Uno
A Research Paper Submitted
to Mrs. Ferrera E. Oira in Partial
Fulfillment in the Requirement in Research IV
Babiera, Nicole Grace. C
Cornelio, Alecs Angela D.
Duhaylungsod, Fuebvey Joy P.
Ramon Teves Pastor Memorial
Dumaguete Science High School
SY: 2019-2020
Abstract
In this modern world we dwell in, everywhere around us is susceptible to innovative technology. In any way possible, people try to innovate and invent things that would make work easier and simpler, which is indeed beneficial considering the time allotment needed for a single work to be done. But what remains unstable and stagnant despite the developing technology is the seemingly alarming threat of waste management. Despite technological advancements, there are only a few innovations in this matter which then led the researchers in pursuing the study in high hopes that it would in a way reduce unnecessary trash thrown in landfills and segregate metal, biodegradable, and transparent plastics accordingly.
The researchers started the research by finding out the value of the sensor SR-S153 (an alternative sensor for biodegradable waste) which in this case was not compatible with Arduino since it is mechanical. A multitester and a voltage divider were used before finally finding a way to connect it to the Arduino microcontroller. A 9-gram servo motor is designated to maneuver the rotation of the hatch/flap, and a 20-kg servo motor for the rotation of the plate supporting the bins. The researchers, with the now Arduino-compatible SR-S153 and the metal sensor together with the servo motors, encoded the codes in the Arduino IDE and finally uploading it to the Arduino microcontroller. A test was done using different kinds of metal, transparent plastic, and biodegradable waste, and the machine has been proven effective in the segregation of the wastes.
Acknowledgment
This research study wouldn’t have been possible without the people who constantly aided to help throughout the whole process. The researchers would like to extend their deepest gratitude and appreciation to recognize the following people who held a part of the success of this study:
To Mr. Jeffrey Tubog and Mr. Niel Steven Villamil of Foundation University for expounding background knowledge and sending out their never-ending support and guidance throughout.
To Mr. Harold Patricio A. Lamostre and Mr. Jan Michael Rogelio for giving the researchers timely advice in the process of making the study.
To Mondrayniel F. Sarte for giving out his proficient help and guidance in the planning of the Arduino UNO.
To Ms. Ellaine Gabotero for giving out her helping hand and offered ideas that greatly contributed to the study’s success.
To Mrs. Ferrera Oira for supporting the researchers to pursue the study.
To Mrs. Aina D. Pino, and to all subject teachers who readily let the researchers use their time in class to spend it making the study.
To the parents of the researchers who bestowed their ultimate support, understanding, and financially sustained the research study in its way to success.
Above all else, to the God Almighty for giving the researchers the strength and the hope to continue despite trials, to fight no matter how hard the battle turns out, and to hold faith in Him whatever the result may become.
From the deepest part of our hearts, thank you!
Introduction
In recent years, problems with proper waste management have been unanswered. Improper waste disposal - though how prevalent to be implemented - continued to be a major problem that became one of the root causes as to why the Earth continues to experience alarmingly rapid changes. Tracing back from the rapid melting of ice glaciers, extreme weather events, increase in sea level, it all comes back to wastes caused by human activity. The effects of pollution caused by human activity are rather adverse, creating a huge impact on the environment.
Sanguinely, in today’s modern society, discoverers and inventors are creating a world full of intelligent machines that can make the revolutionary world even more advance. The researchers chose this study because of the desire to solve the problems of proper waste management by simply segregating waste using the innovation the researchers are going to make.
It has been observed that the trash we produce today has become diverse than usual. The numerous garbage the world has been producing has not been segregated properly which causes pollution. This has caught the researcher's attention and came up with the idea to innovate a trash bin in which it segregates on its own.
General Objective
This study aims to segregate transparent plastics, biodegradable wastes and metallic rubbish from each other.
Specific Objective
To determine if the alternative sensors will work the way the researchers expect the sensors will do.
Statement of the Hypothesis:
Ha: The prototype trash-bin will be able to segregate waste like transparent plastic, biodegradable, and metal.
Ho: The prototype trash-bin will not be able to segregate waste like transparent plastic, biodegradable and metal.
Main Problem:
How effective is the Self-Segregating Trash Bin in segregating the trash?
Sub-Problems
How accurate will the sensors do in identifying the trash thrown?
What is the extent of its segregation mechanism?
What is the capacity of the storage of the bin?
In today’s society, we are experiencing pollution which is one of the main problems of our planet. Most of us carelessly throw our trash everywhere which causes pollution. This prototype may help in separating garbage in which humans are untrained. With this prototype, the rubbish will be thrown into a tube. Then, it will be sensed by the 2 types of sensors which are the inductive proximity sensor and the SR-S153 sensor.
This study aims to build a prototype that will be put in public places to segregate trash properly. This study is limited to biodegradable, transparent plastic, and metal segregation.
Arduino is an open-source computer hardware and software company based on easy-to-use hardware and software. The Arduino Community refers to the project and user community that designs and utilizes microcontroller-based development boards. These development boards are known as Arduino Modules, which are open-source prototyping platforms. The simplified microcontroller board comes in a variety of development board packages. (Arduino LLC, 2015). Arduino boards can turn inputs to outputs - turning on an LED, using sensors, activating the beeper - using codes encoded as an input.
Arduino Uno microcontroller board is a physical programmable circuit board wherein Arduino codes written in the Arduino IDE are uploaded and processed. It is an open-source microcontroller board based on the ATmega328P and has 14 digital input/output pins (of which 6 can be used as PWM outputs), 6 analog inputs, a 16 MHz quartz crystal, a USB connection, a power jack, an ICSP header, and a reset button. Simply plug it into a computer using a USB cable or power it with an AC-to-DC adapter or battery to get started. (Retrieved from https://store.arduino.cc/usa/arduino-uno-rev3).
Integrated Development Environment (IDE) is an open-source Arduino software used to write codes to upload it to the Arduino board microcontroller. When codes are already uploaded in the microcontroller, the microcontroller reads the input encoded and processes the output.
A rotary actuator that allows control of the rotation with great precision is an electrical device called servo motor. Servo motors make the rotation of the plate supporting the bins possible as it controls the angular position, acceleration, and velocity. Although small and efficient, it is of great use towards an operative manipulation in terms of degrees of the angle of rotation designated. It is compatible with Arduino Uno and can be manipulated through coding using the Arduino IDE.
The SR-S153 sensor is a sensor typically used for the SR coin-slot or the PisoNet coin-slot, which was then used in the study as it is capable of detecting any interference that passes between the infrared transmitter and the receiver. The infrared (IR) transmitter contains an LED that emits infrared light and the IR receiver receives the light emitted directly unto it. The SR-S153 sensor is a mechanical sensor that gives an output voltage of 10V when given an input voltage of 12V, resulting in incompatibility to the Arduino microcontroller which only has a maximum voltage of 5V. It is a stand-alone mechanical sensor used directly in operating PisoNet coin-slot and in no way indicated to be used in any desired Arduino projects.
The Development of Automatic Smart Waste Sorter Machine is a research study machine that sorts out metal, paper, plastic, and glass through an electromechanical system using a microcontroller and operational amplifier. For sorting metal and glass, conventional sensors are used. For sorting paper and plastics, a sensor using laser and LDR is developed. A weight sensor and counter are used to find out the number of sorted materials. The sorting procedure will make recycling more efficient. Utilizing this waste sorter, the conventional waste management system will be transformed into a SMART system. (Russel, M. et al., 2013).
Another study entitled Design and Development of the Trash Splitter with Three Different Sensors used infrared, metal, and light sensors to sort out garbage materials specifically metal, organic, paper, and plastic. The software used in this study is the Arduino IDE. The tools will be designed based on system requirements. The design of automatic garbage sorting tool will consist of: (1) The design of an object detecting the presence of garbage, (2) design of sorting metal, (3) Design of sorting organic, (4) Design paper sorting, (5) The design of the plastic sorting (Angin, D. et al, 2018).
Software design includes the initialization program on the microcontroller, sensor initialization, and initialization of additional support tools. Detection of the presence of waste serves to indicate that there is a waste to be processed by the tool consists of infrared and servo distance sensors. The metal divider will serve as a metallic waste scavenger consists of metal and servo sensors. Organic sorting will serve as organic waste sorting by using a different method of waste weight. Organic waste tends to be heavier than plastic waste and paper waste. Consists of infrared sensors, servo, and fan pusher. Paper sorting will serve as paper waste sorter by utilizing light reflection difference method by paper. The paper tends to reflect the light on it. It consists of an infrared sensor, light sensor, servo, and laser. Plastic sorting will function as a plastic waste sorter by utilizing the difference reflection method of light. Plastics tend to pass on the lights that hit them. It consists of an infrared sensor, light sensor, servo, and laser. The plastic dividing part is the same place in the paper sorting section (Angin D. et al, 2018).
A study from Ateneo de Zamboanga University entitled Self-Monitoring Automated Route Trash Bin (SMART Bin) uses Gizduino 4.0 (an Arduino-compatible platform) as its main processing unit. The SMART Bin follows an ultrasonic-sensing mechanism to generate a route for it to follow. It is a wall-following and obstacle-detecting device (Cabio, M.A., 2014). The researchers’ assumptions towards the study’s possibility were strengthened by this study. Although the study used Gizduino 4.0, the sensors, microcontrollers, and motors are similarly connected to the Self-Segregating Trash Bin.
Methodology
Research Design
This study is experimental research because it adheres to scientific research design. The study has a hypothesis, variables that the researcher manipulates, and also other variables that are measured, calculated, and compared.
Materials/Equipment
A. Electronics
A.1 Arduino UNO R3 Microcontroller
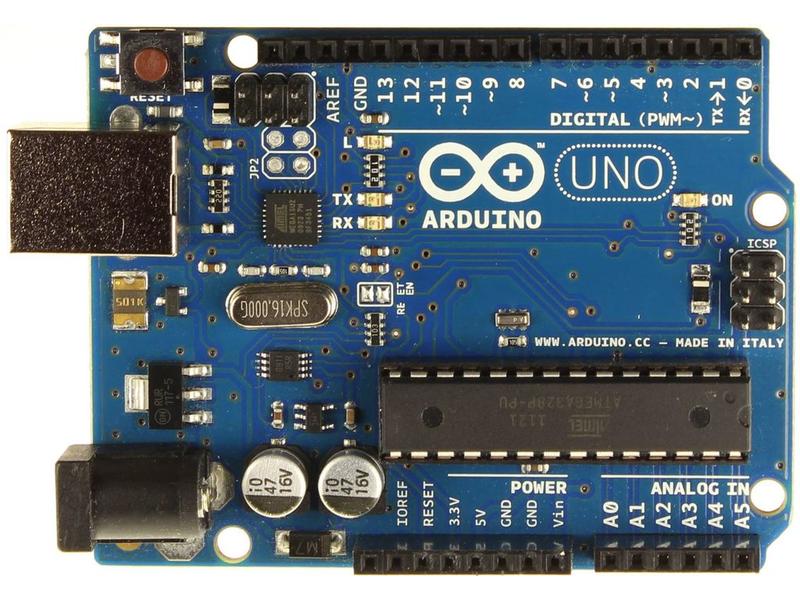
Figure 1. Arduino UNO Microcontroller
Arduino is an open-source platform used for building electronics projects with easy accessibility of the software/hardware platform and is compatible with many sensors available in the market. Everything needed for the sensors to work is present on the board. Arduino consists of both a physical programmable circuit board and a piece of software, or IDE (Integrated Development Environment) that runs on a computer, used to write and upload computer code to the physical board. (“What is an Arduino?”, 2017).
A.2 Breadboard
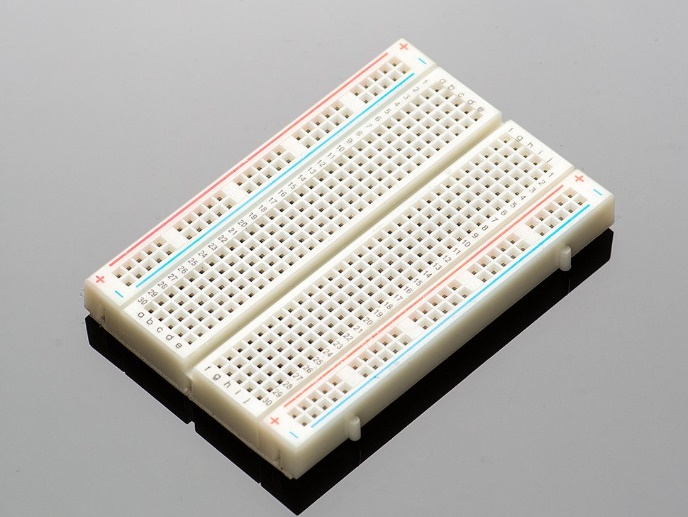
Figure 2. Breadboard
It is a solderless device for a temporary prototype with electronics and test circuit designs. Electronic components in a circuit can be interconnected by inserting the terminals of the wires into the appropriate holes and then making connections through wires where appropriate. The breadboard has strips of metal underneath the board and connects the holes on the top of the board. (Barragan, n.d.).
A.3 Jumper Wire
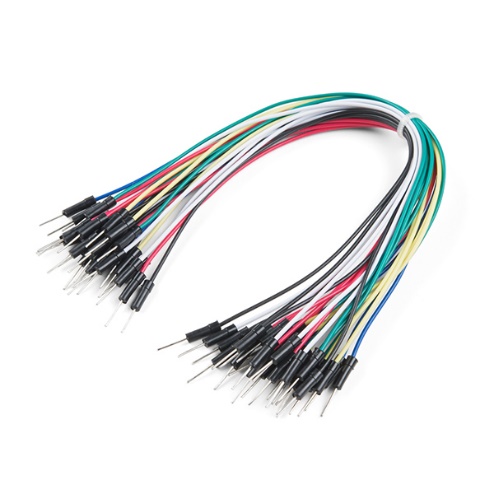
Figure 3. Jumper Wire
The term "jumper wire" simply refers to a conducting wire that establishes an electrical connection between two points in a circuit. You can use jumper wires to modify a circuit or to diagnose problems in a circuit. These are wires with connector pins at each end that allow a two-point connection without soldering. (“Jumper Wires,” 2018).
A.4 Servo Motor SG9
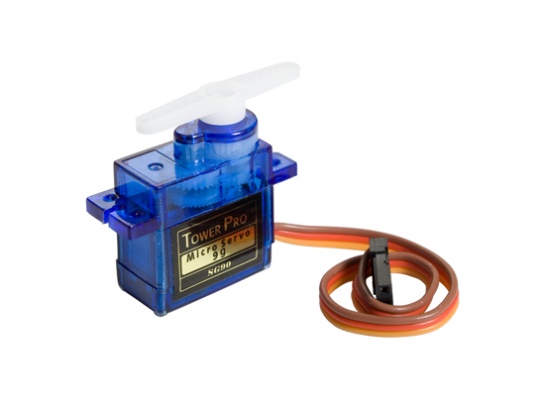
Figure 4. 9g Servo Motor
Servo motors have been around for a long time and are utilized in many applications. They are small in size but pack a big punch and are very energy-efficient. These features allow them to be used to operate remote-controlled or radio-controlled toy cars, robots, and airplanes. Servo motors are also used in industrial applications, robotics, in-line manufacturing, pharmaceutics, and food services. (“How do servo motors work?”, n.d.).
A.5 Servo Motor D3620
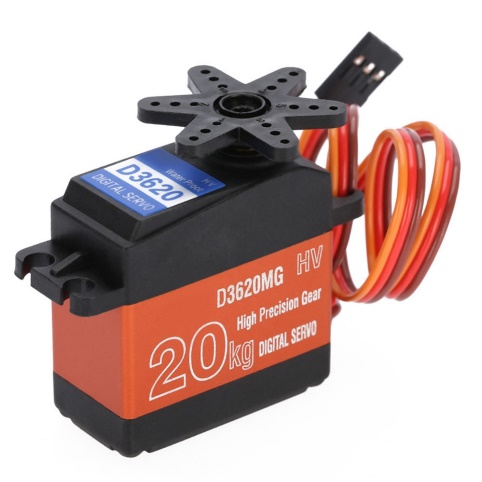
Figure 5. 20kg Servo Motor
Servo motors are great devices that can turn to a specified position. Usually, they have a servo arm that can turn 180 degrees. Using the Arduino IDE, we can tell a servo to go to a specified position and it will go there. Servo motors were first used in the Remote Control (RC) world, usually to control the steering of RC cars or the flaps on an RC plane. With time, they found their uses in robotics, automation, and of course, the Arduino world. (Amber, 2018).
A.6 SR-S153 Sensor
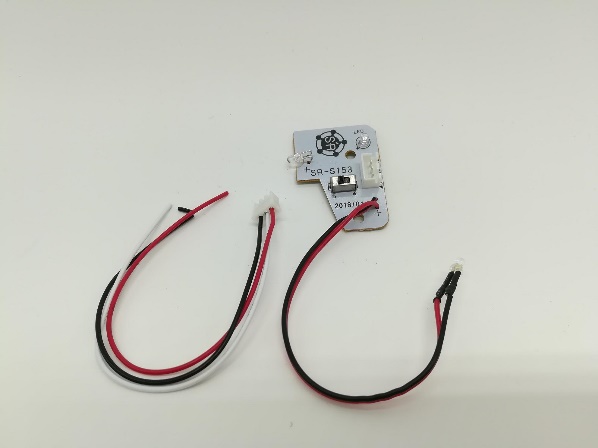
Figure 6. Alternative Sensor for Transparent and Biodegradable Waste
The SR-S153 is an alternative sensor for transparent and biodegradable waste. It is a coin slot sensor in which it uses infrared (IR) lights to detect the presence of an object.
A.7 Pin headers
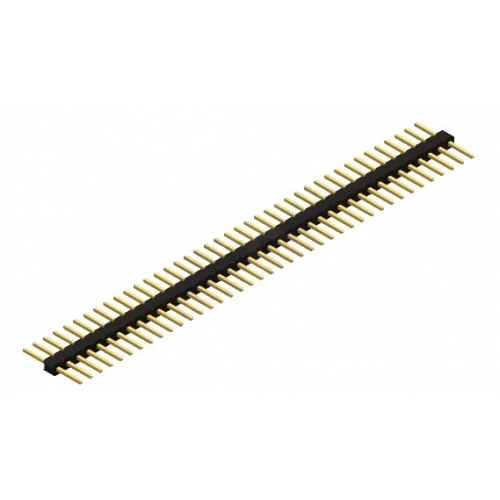
Figure 7. Pin Header
Male pin headers are most often encountered when you buy a board that you're expected to plug/insert into a circuit somewhere, often by inserting it into some female pin headers. ( What is the use of pin headers? n.d.).
A.8 Perfboard
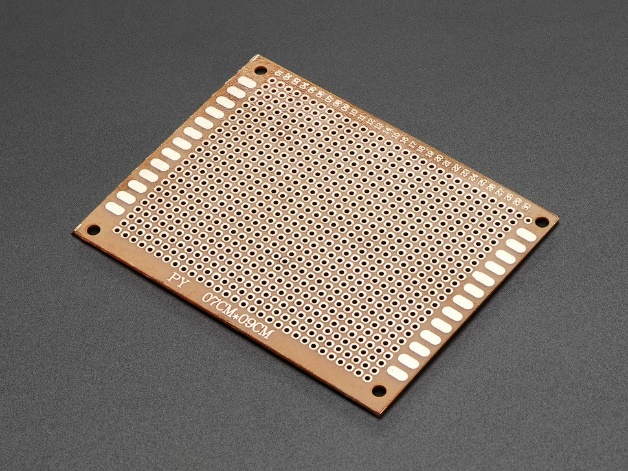
Figure 8. Perfboard
It is a pre-drilled circuit for creating prototypes of simple circuits.
A.9 Soldering Station with Soldering Iron
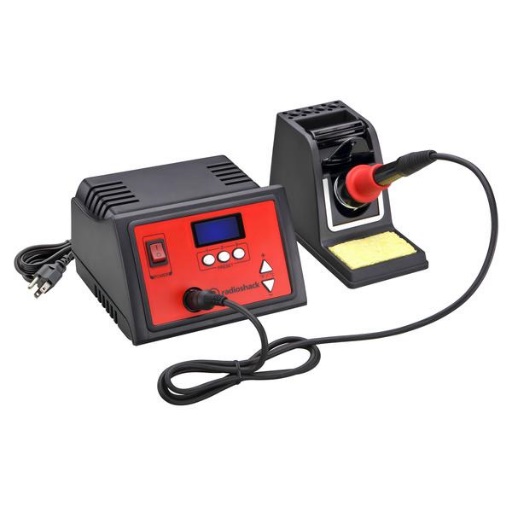
Figure 9. Soldering Station with Soldering Iron
It is used to permanently connect the electronic components into the Perfboard.
A.12 Standard Wire
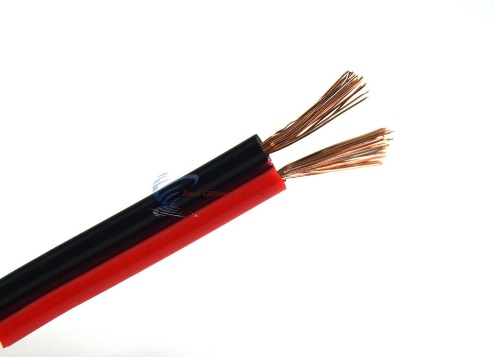
Figure 12. Standard Wire
This is used to connect the microcontroller and the voltage divider.
A.13 Switch 220V
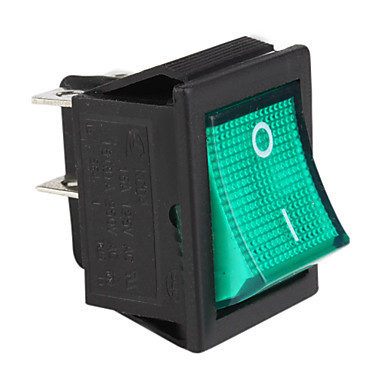
Figure 13. Switch 220V
This is the switch the researchers used to turn on the prototype.
A.14 Hot Glue

Figure 14. Hot Glue
The hot glue is used to attach the Sensor Switch LJ12A3-4-Z/X Inductive Proximity NPN DC 6V-36V and 6 SR-S153 Sensor to the PVC pipe.
A.15 Barrel Power Socket
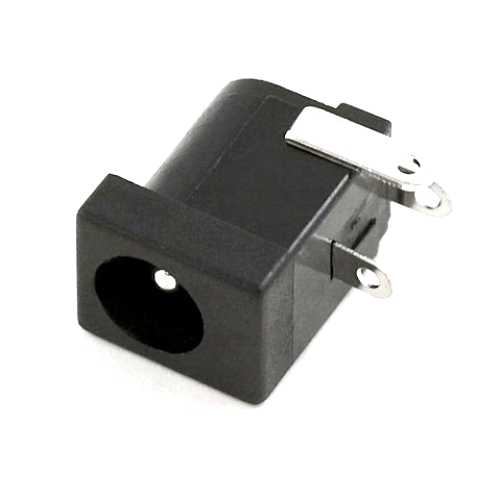
Figure 15. Barrel Power Socket
Wall adaptors are widely available, in a variety of power ratings and voltages, making barrel connectors a common means for connecting power to small projects. PCB mounted (surface mount or through-hole), cable mount, or panel mount. Some of these connectors will have an additional contact that allows the application to detect whether a power supply is plugged into the barrel jack or not, thus allowing the device to bypass batteries and save battery life when running on external power. connector basics. (n.d.). Retrieved from https://learn.sparkfun.com/tutorials/connector-basics/power-connectors
A.16 12VDC 2A Adopter
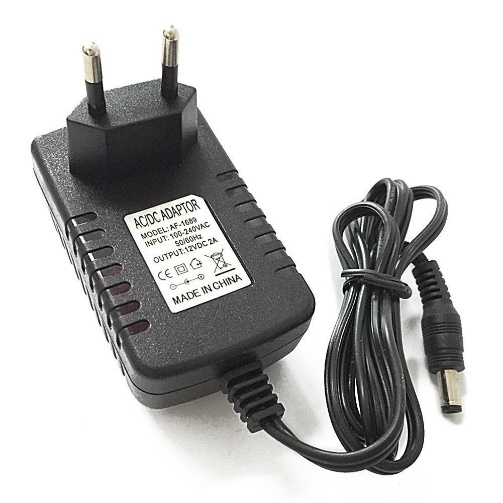
Figure 16. 12VDC 2A Adopter
12V power supplies (or 12VDC power supplies) are one of the most common power supplies in use today. In general, a 12VDC output is obtained from a 120VAC or 240VAC input using a combination of transformers, diodes, and transistors. (Tahmid H., 2017).
A.17 Resistors
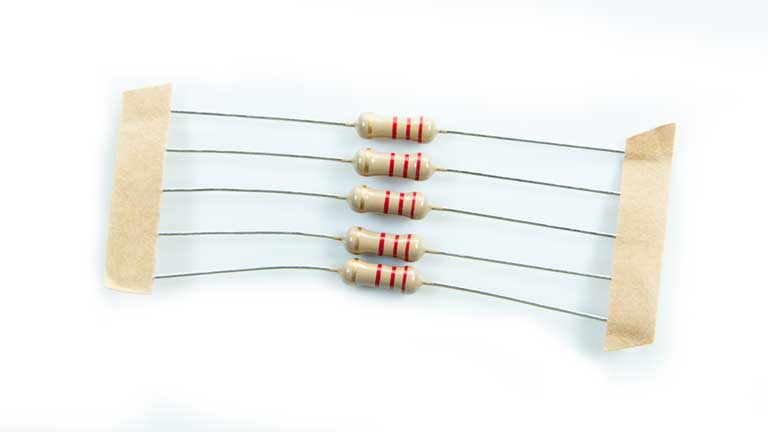
Figure 17. Resistors
It is a passive two-terminal electrical component that implements electrical resistance as a circuit element. In electronic circuits, resistors are used to reduce current flow, adjust signal levels, to divide voltages, bias active elements, and terminate transmission lines, among other uses.
A.18 Multitester
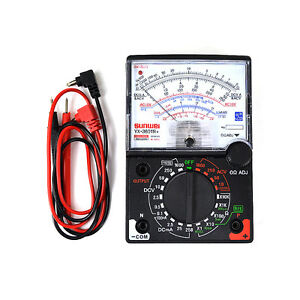
Figure 18. Multitester
A multimeter or a multitester, also known as a VOM (Volt-Ohm meter), is an electronic measuring instrument that combines several measurement functions in one unit. A typical multimeter may include features such as the ability to measure voltage, current, and resistance (Rommel, n.d.).
A.19 Female-to-Female Jumper Wire Connectors
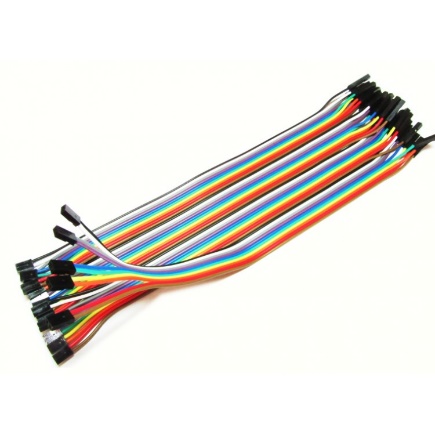
Figure 19. Female Jumper Wire Connectors
Female-female jumper wires are handy for making wire harnesses or jumpering between headers on PCB's. These premium jumper wires are 6" (150mm) long and come in a 'strip' of 20 (2 pieces of each of ten rainbow colors). (Retrieved from https://www.adafruit.com)
B. Prototype structure
B.1 Polyvinyl Chloride (PVC) Pipe 4 inches

Figure 20. Polyvinyl Chloride (PVC) Pipe 4 inches
PVC stands for polyvinyl chloride, and it’s become a common replacement for metal piping. PVC’s strength, durability, easy installation, and low cost have made it one of the most widely used plastics in the world. PVC is a thermoplastic material that is molded into different shapes to create pipes, fittings, valves and other liquid handling supplies. (Korey, 2017).
B.2 Plywood

Figure 21. Plywood
This is used for the base of the prototype and plate supporting the PVC pipes.
B.3 Screws
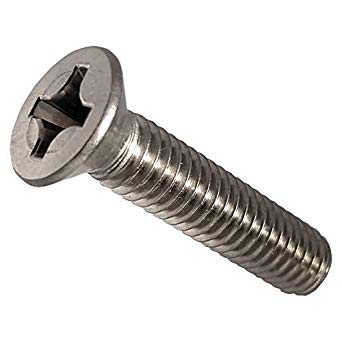
Figure 22. Screws
The screw is used for the safety of the servo in the prototype.
B.4 Nails
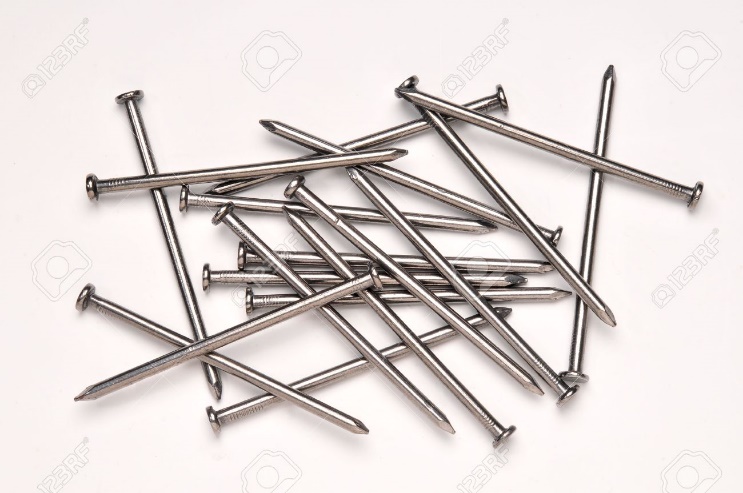
Figure 23. Nails
This is used to connect the base of the prototype to form it.
B.5 Epoxy Sealant
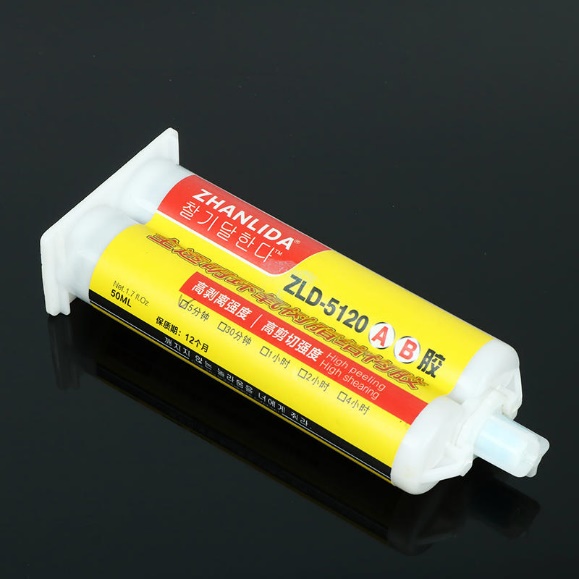
Figure 24. Epoxy Sealant
This is used to fill in the gaps between the interconnected plywood of the prototype.
General Procedure
A. The making of the electronics
A.1 Finding out the value of the SR-S153
The researchers used an alternative sensor (SR-S153) in differentiating transparent plastic from biodegradable trash. The output voltage of SR-S153 is 10 volts. To find the data output of the alternative sensor, the use of a multi-tester is needed. Power up the sensor with a 12V power adopter and use the multi-tester to see the value that the signal wire is giving.
A.2 Finding out how to connect the sensor SR-S153 to the microcontroller
The value of the sensor is way too big for the microcontroller. The researchers thought of a way to reduce its output voltage using a DIY voltage divider. In this way, the alternative sensor can now be connected to the microcontroller.
Materials needed are three different colored solid wires, soldering iron, perfboards, and three coin sensors (SR-S351). First, gather all the materials mentioned. Then, connect the three-coin sensors with its voltage divider. In doing so, solid wires are needed. Use at least three solid wires with different colors so that it can be easily differentiated. In connecting the sensors, the first thing to do is to connect all the positive and negative power to a perfboard. Then, connect the signal wires as well. After, using the perfboard with all the wires from the three sensors, connect it to the microcontroller.
A.3 Voltage divider
Materials needed are, three resistors, soldering iron and a perfboard. The work of the voltage divider is to reduce the output voltage given by the coin sensor since it is too big for the Arduino microcontroller. In making a voltage divider, The first thing to do is to solder the three resistors in the perfboard. Then connect the output voltage ( signal wire) on the first resistor then at the end of the three resistors, connect it to the microcontroller.
The very first resistor receives the output voltage of the coin sensor, then its voltage will pass by the three resistors and its work is to cut down its voltage so that the output voltage will now be 5 volts and can be connected to the Arduino microcontroller with the help of the voltage divider.
A.4 Inductive Proximity Sensor (Metal Sensor)
Materials needed are the inductive proximity sensor, female connector, and a resistor. The first thing to do is to place a resistor between the positive power and the signal wire. That is because the metallic sensor is normally closed so whenever the sensor detects a metal object in front then it turns on. After, connect all the wires with the resistor into the female connector so that it can be connected to the microcontroller with a header pin. The header pin is connected to the main perfboard which is connected to the microcontroller. All sensors are connected in the main perfboard and the main perfboard is connected to the microcontroller.
A.5 Coding
When all the sensors altogether to the microcontroller, together with the two servo motor, input the codes shown in figure 25.
#includeint trashIn = 10, transparentSensor = 6; int metallicSensor = 5; int servoBin = 11; int servoHatch = 12; boolean done = false, in = false; Servo servo1; Servo servo2; void setup() { // put your setup code here, to run once: pinMode(transparentSensor, INPUT); pinMode(metallicSensor, INPUT); pinMode(trashIn, INPUT); servo1.attach(servoBin); servo2.attach(servoHatch); Serial.begin(115200); Serial.println("Initializing..."); // prints in serial monitor delay(1000); openHatch(); delay(3000); Serial.println("AutoBin Ready"); } void loop() { // put your main code here, to run repeatedly: int trash0 = digitalRead(trashIn); delay(1500); Serial.println(trash0); int count = 0; while(digitalRead(trashIn) || in == false){ Serial.print("..."); // while no waiting for trash input if(trash0 == 1 && count != 20){ in = true; done = true; }else if(count == 20){ Serial.println(); // next line count = 0; }else{ in = true; done = true; } count++; delay(1000); } int trash = digitalRead(metallicSensor); // read metallic sensor int trash2 = digitalRead(transparentSensor); // read sensor delay(1000); if(trash == LOW && trash2 == HIGH){ // check if metallic Serial.println("\nMetallic"); servo1.write(90); // rotates servo to 90 degrees delay(1000); // delay 1000 millis if(done){ openHatch(); } // if not metallic }else if(trash == HIGH && trash2 == LOW){ // check if transparent Serial.println("\nNot metallic"); // prints in serial monitor Serial.println("Transparent"); // prints in serial monitor servo1.write(0); // rotates servo to 0 degree delay(1000); // delay 1000 millis if(done){ openHatch(); } }else{ // if not transparent Serial.println("\nNot metallic"); // prints in serial monitor Serial.println("\nNot transparent"); // prints in serial monmitor servo1.write(180); // rotates servo to 180 degrees delay(1000); if(done){ openHatch(); } } // } // delay(5000); } /* the functions below is for future modification */ void openHatch(){ // this function is for openning the hatch servo2.write(0); delay(1000); servo2.write(180); done = false; in = false; Serial.println("Done"); }
Figure 27. Codes
A.6 Flowchart
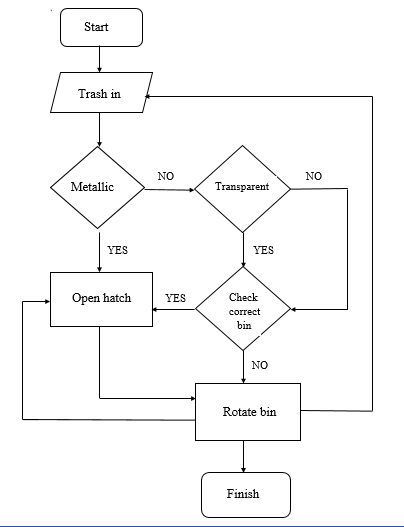
Figure 28. Flowchart of the self-segregating trash bin
B. Assembly of the Prototype
B.1 Gather Materials
The very first thing to do is to gather all the materials. To be prepared in this step are 4-inch PVC pipes, plywood, nails, and screws. The PVC pipe should be cut into three equal parts (for the bins) and a separate one for the tube. The three bins equally have a height of 4 inches, while the tube has a height of 9 inches. 20 nails and 12 screws are needed to secure the construction of the prototype.
B.2. Building of prototype
Using the plywood, the base of the prototype shall be started and the other parts as well, its measurements are: 12 x 9 inches for the topmost part where the tallest tube will be placed, two 12x12 for the base with four 1.5x12 inch wood for the sides of the base,18x12 inch wood for the back support of the tube holder connected from the base of the prototype and a 11.8 inch^2 circle for the plate where the three PVC pipes will be placed.
Using the four 1.5x12 inch wood form a square. Use nails to connect the wood. Then, use one of the 12x12 inch plywood for the floor and the other one for the cover, in this case, use screws instead si that anytime the servo breaks or fails it can be replaced. After, make a hole in the cover so that the 20kg servo will be mounted. Then use the 18x12 wood for the support. Connect it to the base of the prototype using nails now so that it will be secured, use multiple nails. Then, now its time to make the tube holder where the tallest tube is going to be placed and all the wirings, the perfboard, and the microcontrollers are going to be pasted or placed. Using the 12x9 inch wood makes a hole in the middle where the tallest tube will fit. After, connect it to the back support using nails. Finally, make the plate with the said measurements. In the middle of the plate make a hole where the tip of the servo motor will be inserted so that whenever the servo motor turns the whole plate turns as well.
C. Final Procedure
For the prototype to work, electricity is needed. A 12V adapter does the job of converting electricity from the power socket to the prototype.
The first thing to happen when throwing the trash into the prototype is that the coin sensor on the opening needs to be cut and for this to be cut the thrower's hand needs to be close on the opening. After sensing that someone is about to throw, the sensors that will detect what type of trash will turn on else if it is not cut the sensors will not work. After, the metal sensor will first detect the trash thrown. If the metal sensor detects the trash as metal then the plate containing the pipes (bins) will not move since the starting point of the servo is the metallic bin. Then the hatch opens and the trash falls. If the trash thrown is non-metallic, it then proceeds to the coin sensor which identifies if the trash is transparent plastic or biodegradable waste. If the sensor detects that it is non-metallic and transparent therefore the plate turns 90 to its left, else if the plate turns 90 to its right. Then, the hatch opens and the trash falls to its designated bin.
Results and Discussion
The researchers conducted thorough testing of the prototype, Self-segregating trash bin using Arduino Uno with three types of trash namely transparent plastic, paper, and a metal bar. Using the two types of sensors, the inductive proximity sensor for metal and the SR-S153 for the biodegradable waste and transparent plastic, the prototype successfully determined some of the trash and was able to put it on its corresponding bin.

Figure 29. Serial Monitor
As seen in Figure 28, whenever the serial monitor flashes the word metallic the 20kg servo which is the one rotating the pipes, does not turn since the pipe designated to metallic objects is the starting point of the servo. When it shows non-metallic and transparent that means the detected object is transparent plastic and the servo motor turns 90° to its left. Whenever the serial monitor flashes non-metallic and non-transparent therefore it is biodegradable, then the servo motor turns 90° to its right.
The researchers tested the Self-segregating trash bin using 10 garbages each type. For biodegradable, the researchers used paper, orange peel, cardboard, banana peel, manila paper, leaf, paper cup, wood, tissue, and a ripe banana. The results show that 8 items were detected successfully and the other two were not. These are the leaf and the tissue. The researchers conclude that it is because the item lies flat on the hatch, therefore, it was not recognized by the sensors.
For transparent plastics, the researchers used the clear envelope, plastic cover, clear plastic bottle, semi-transparent colored hanger, clear folder, clear plastic cup, clear spoon, clear fork, clear straw, and a clear plastic bag. The results show that 9 out of 10 trash is recognized. The semi-transparent colored hanger was not recognized.
For metal waste, the researchers used five different metal screws, a metal slab, sardine can, metal spoon, metal fork, and a metal straw. The results show that only 2 out of the 10 trash thrown were detected successfully and these are the sardine can and metal slab. Therefore, the researchers conclude that only the big ones can be detected since it shows in the limitation that the metal can detect the only 4mm away from the sensor.
The self-segregating trash bin is feasible in segregating transparent plastic, biodegradable waste and some of the metallic trash. As the researchers were conducting final testing upon the effectivity of the study, it has been monitored that every trash is thrown (also limited to the scope set to the self-segregating trash bin) is detected the moment the sensor SR S153 located at the opening of the trash bin senses impending garbage. When the trash falls through the pipe the metal sensor first detects if the trash thrown is metal. If not it directly goes through the sensors for biodegradable and plastic.
When the sensors finally detect what kind of trash is being thrown, results show in the serial monitor. The plate rotates, and the hatch opens up to show the right bin for the garbage.
Summary and Conclusion
The machine prototype was able to segregate metal, transparent plastics, and biodegradable wastes. The researchers can say that the Self-Segregating Trash Bin Using Arduino Uno is effective and therefore Ha is accepted. Careful testing and analysis have been done and it was found out that one has to throw the garbage with a very close distance from the opening of the trash bin in a way that the infrared sensors can sense impending garbage.
To conclude, the machine Self-Segregating Trash Bin using Arduino Uno is functional.
Recommendations
For further investigation, the researchers recommend exalting on the segregation of all types of plastics instead of transparent plastics only. The researchers also recommend to further innovate the machine in a way that it can determine what kind of biodegradable waste or trash it is. It is highly significant to not limit the self-segregating trash bin only to generally biodegradable waste and transparent plastics so that proper segregation of wastes would be implemented to all types of wastes.
Appendices
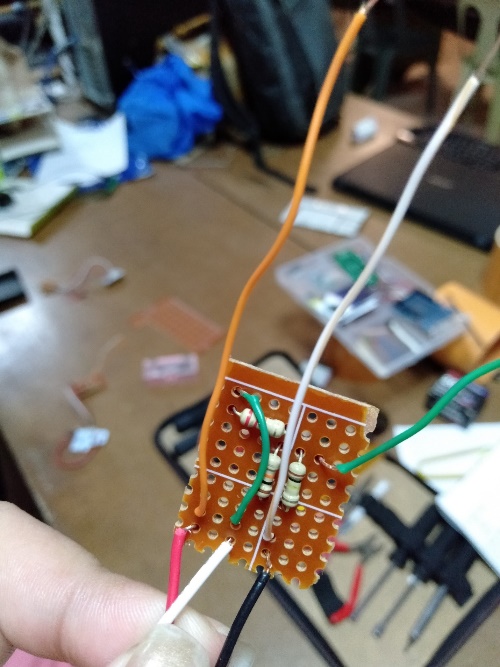
Figure 29. Voltage Divider
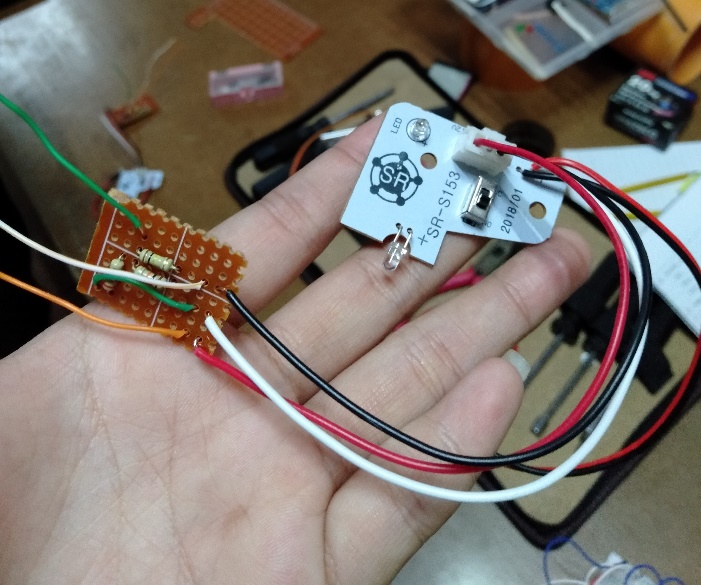
Figure 30. Sensor SR-S153 is connected to the voltage divider
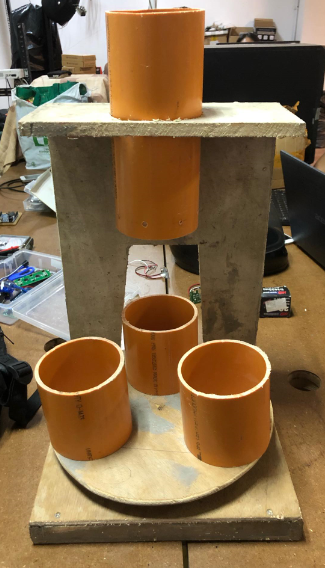
Figure 31. The prototype
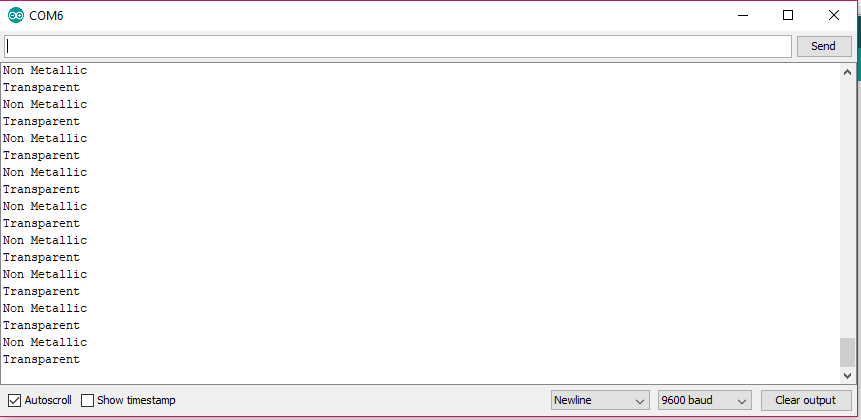
Figure 32. Serial monitor showing the type of trash detected by the sensors
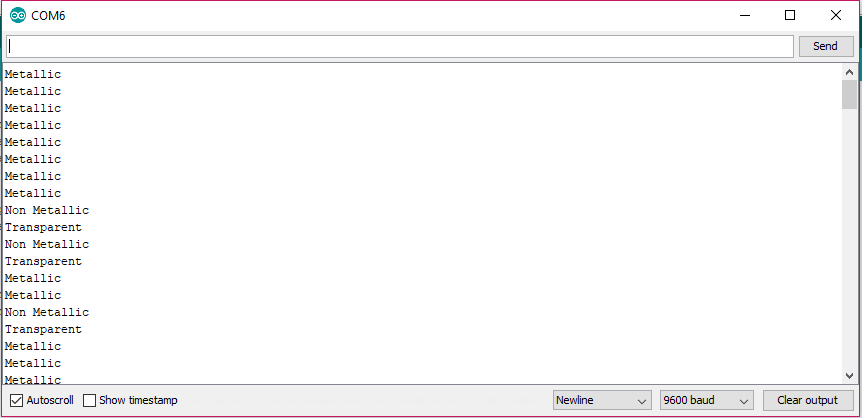
Figure 33. Serial monitor showing the trash detected by the sensors
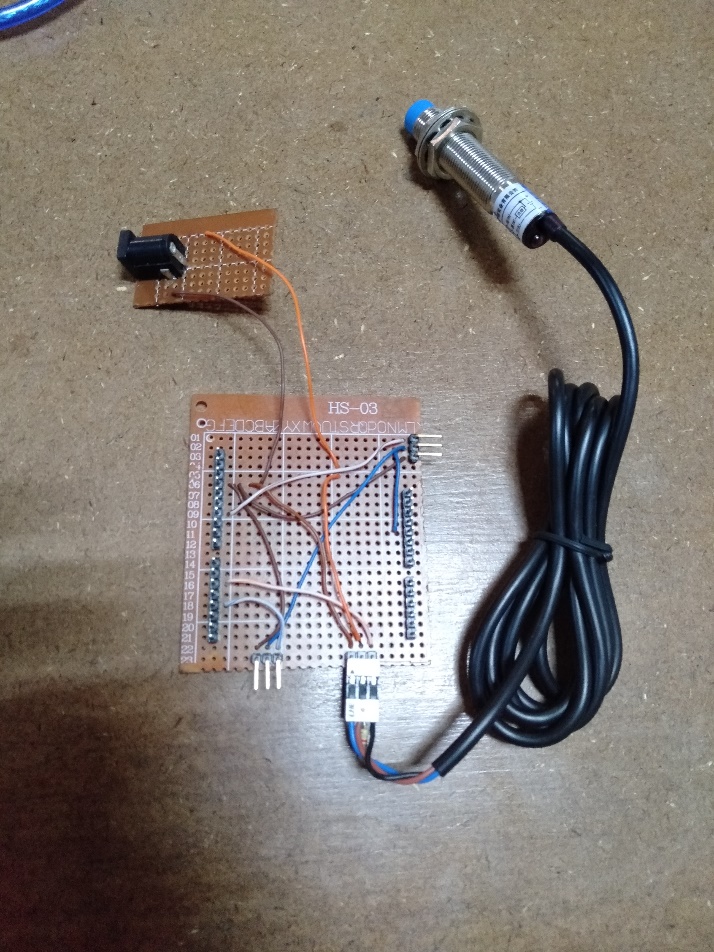
Figure 34. Inductive proximity sensor connected to the main Perfboard.
References
What is Arduino?
Development of Automatic Smart Waste Sorter Machine
Design and Development of the Trash Splitter with Three Different Sensors
Self Monitoring Automated Route Trash Bin (SMART Bin)